
See the idea
Two computers. One small network.
A cable connects the devices. A request and reply test whether they can communicate.
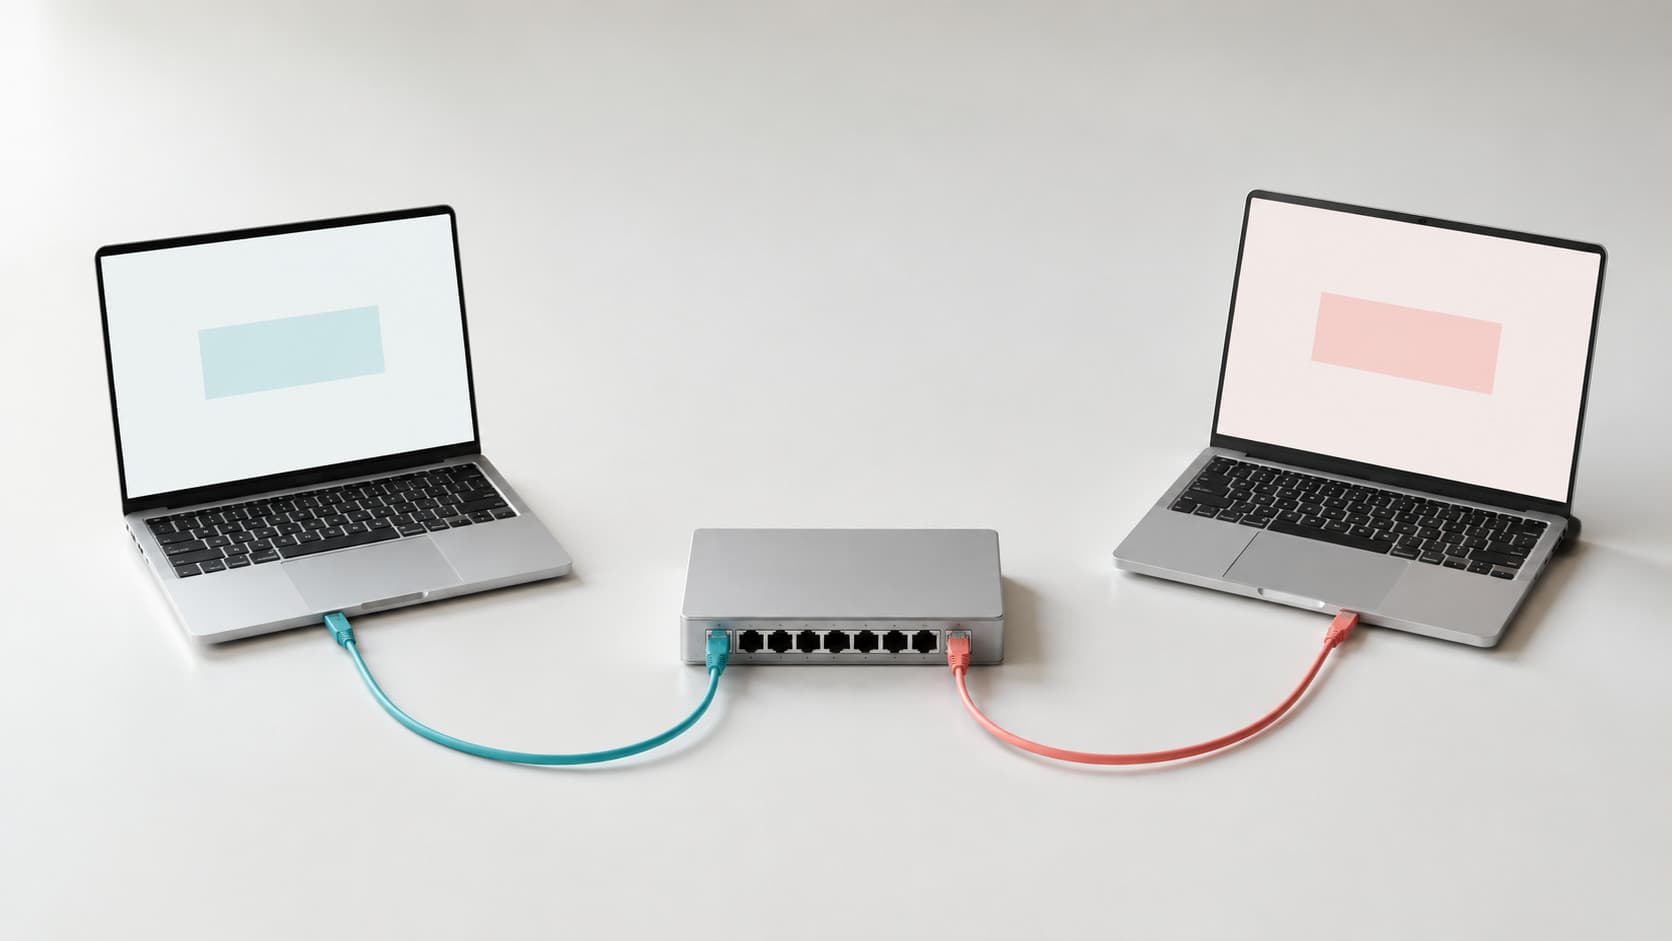

Connect the devices
Give each computer its own cable to the switch. In GNS3, connect two VPCS nodes to one built-in Ethernet switch. A cable alone is not a successful test.
What this model leaves out: This simplifies the ping request and reply. It omits address discovery and frame forwarding details. A reply does not prove that a website or application works.
Full visual explanation and references
PC1 connects through one Ethernet switch to PC2. A ping request travels from PC1 to PC2; a reply travels back. Both computers need the planned addresses.
This simplifies the ping request and reply. It omits address discovery and frame forwarding details. A reply does not prove that a website or application works.
- Connect the devices
Give each computer its own cable to the switch. In GNS3, connect two VPCS nodes to one built-in Ethernet switch. A cable alone is not a successful test.
docs.gns3.com - Send a test request
After setting the planned addresses, run ping 192.168.10.2 in PC1. The request is for PC2, not PC1's own address. The arrows show its simplified outbound path.
docs.gns3.com - Look for the reply
A reply from PC2 comes back to PC1. Read the result in PC1's console. No reply means you should check the links, addresses and test settings before changing anything else.
docs.gns3.com
One idea at a time
Start with something familiar.
Imagine you have never set up a network. That is a valid starting point. We will use two small simulated computers, called PC1 and PC2, inside one program. PC means personal computer. Nothing in this exercise needs a real office router or a public Internet connection between those practice devices.
Why learn this?
When a device cannot reach another device, a wrong setting can look like broken equipment. Learning to read one address and run one small test helps you find a cause before replacing things or changing several settings.
An everyday comparison
Imagine delivering a note between two desks in one room. Each desk needs a different label so the note reaches the intended person. You first check the label, then deliver the note, then look for a reply. If you copy a label wrongly, checking it is more useful than replacing both desks.
What happens in a network
Our two practice computers have different IP addresses, which are number labels used for network communication. They share one local group, called a subnet. A switch provides the connection between them. A ping is a small test that asks the other computer for a reply.
Where the comparison stopsA switch is not a person reading a desk label. It forwards Ethernet frames using its own addressing rules. An IP address also is not a permanent identity. We study these details later; the desk story only helps explain checking a destination and a reply.
Follow one worked example
- Give each practice computer its own address.
PC1 gets 192.168.10.1. PC2 gets 192.168.10.2. Both use the mask 255.255.255.0, which marks the same local group in this example.
Why: Different devices need distinct addresses in this group. The matching mask helps each device decide which addresses are local.
- Ask PC1 to test its connection to PC2.
In PC1's text window, ping 192.168.10.2 asks for replies from PC2. A reply tells you a test message went there and a reply came back.
Why: The test must run from the other computer. Asking PC2 to reach its own address does not test the connection between the two computers.
- Make one controlled address mistake.
Changing PC2 to 192.168.20.2 puts it in a different local group with this mask. There is no router to join those groups, so PC1's test to that address fails.
Why: Only one setting changed. Comparing the before and after results makes that setting a useful explanation for the failure.
- Restore the original address and test again.
Set PC2 back to 192.168.10.2. Return to PC1 and test 192.168.10.2 again. The lab below shows exactly where to type and what to look for.
Why: A successful repeat test supports the explanation that the address caused this lab's fault. It does not prove that every application works.
Your first small task
On paper, draw two boxes labelled PC1 and PC2, with a switch between them. Write 192.168.10.1 under PC1 and 192.168.10.2 under PC2. Write mask 255.255.255.0 beside both. Circle the number that is different.
Show a hint
Read the address as four whole numbers separated by dots, not one long decimal number. Compare the numbers from left to right.
Check the expected result
Only the last number differs: 1 and 2. With this particular mask, the first three numbers describe the shared local group.
Pause and explain it in your own words
Why do we return to PC1 to test PC2 after fixing PC2's address?
Show a hint
Think about which test needs the connection between the two boxes on your drawing.
Show the explanation
A test from PC1 to PC2 uses their connecting path. A test from PC2 to its own address can succeed without using that path, so it would not show that the connection was repaired.
Short answer
What should you understand today?
A network lets connected devices exchange information. Today you will connect two practice computers, give each an address and ask one to send a test to the other. You will then make one planned mistake, find it and correct it. The practice runs inside GNS3, a network lab program, so you do not change your real home or work network.
Before you begin
Learning targets
- No previous network knowledge is needed. If clicking, typing or saving files is new, read the Start from zero guide first.
- For the software exercise, use a computer with GNS3 installed and its local server working. The beginner guide links to official installation help.
- Keep a paper or digital note. If you only have a phone, follow the worked example and paper task now; return to the software lab later.
- Explain a network, a switch and an IP address in your own words.
- Connect two simulated computers inside a safe GNS3 project.
- Read and type four small commands, knowing what each one does.
- Recognize a wrong address, correct it and check the result.
- Save the working settings and explain what your test proves.
Words you will meet
Open a word when you need its meaning. You do not need to memorize the whole list before reading.
CCNA
Cisco Certified Network Associate: a certification for foundational networking knowledge and skills.
Network
Connected devices that can exchange information. A small local network does not need an Internet connection.
GNS3
A program for building practice networks from simulated or emulated devices. Today's project stays separate from real networks.
Project and topology
A project stores a lab's devices and settings. Its topology is the picture or description of their connections.
VPCS
Virtual PC Simulator: a small test computer for network commands, not a full desktop computer with ordinary apps.
Switch
A device connecting local links and forwarding Ethernet frames. It does not automatically fix a computer's IP settings.
Ethernet and frame
Ethernet is a common local networking technology. A frame is a unit of information carried over its links.
Port or interface
A connection point on a device. Ethernet0 and Ethernet1 name different ports, often numbered starting at zero.
IP address
An Internet Protocol address identifies a network connection. An IPv4 address contains four numbers separated by dots.
Subnet and mask
A subnet is an IP network group. A mask defines its boundary; 255.255.255.0 and /24 express the same IPv4 boundary.
Router and gateway
A router moves information between IP networks. A default gateway helps reach other networks when no more specific path applies.
Console and prompt
A console is a device's text window. Its prompt, such as PC1>, identifies where a command will run; do not type the prompt.
Command
An instruction typed into a device's console. Press Enter to run it, then read the response before continuing.
Ping and ICMP
Ping uses Internet Control Message Protocol test requests and replies to check reachability. Success does not prove all applications work.
Configuration
A device's collection of settings. The VPCS save command stores its current settings in a startup file.
Troubleshooting
Finding a cause by comparing expected and actual results, checking one thing at a time and retesting after a correction.
What you are learning, and why it starts small
CCNA stands for Cisco Certified Network Associate. It is a certification for people learning to work with computer networks. A certification exam checks knowledge and skills. It is not something you need to pass before you can begin this course. We start with one small network because it is easier to see why each part matters.
Cisco gives each exam a topic list, also called a blueprint. The current 200-301 v1.1 exam covers network fundamentals (20%), network access (20%), IP connectivity (25%), IP services (10%), security fundamentals (15%), and automation and programmability (10%). These percentages show how the exam topics are weighted. You do not need to understand all six names today.
The current exam is available through 2 February 2027. Version 2.0 starts on 3 February 2027. Choose the official topic list for your planned exam date. Our 60 lessons form a learning order, not a promise that everyone will be exam-ready in 60 days. The weekday release schedule is not a deadline for you. Repeat an example, take a break and ask for help when needed.
- Begin with one clear idea and one small result, not a list of commands to memorize.
- Use the official exam topic list for the date you plan to take the exam.
- Your learning pace can be slower than the course publication schedule.
Meet your two practice computers and their switch
GNS3 is a program for building practice networks. Its workspace is the area where you place devices and draw their connections. A saved collection of devices and settings is a project. The connection picture is a topology. A node is one device in that picture. These names describe things you can see; they are not extra tasks.
VPCS means Virtual PC Simulator. It behaves like a small computer used for network tests. It is not a full Windows computer and does not have a browser or office apps. We use two instances, meaning two separate copies, named PC1 and PC2. Each has its own address and its own text window for commands.
The built-in Ethernet switch connects the two practice computers. Ethernet is a common technology for carrying information over local links. A port or interface is a connection point. The first port may be numbered zero, so Ethernet0 is a name, not a warning. In this lab, both switch ports stay in one shared access segment: one local connection group.
The switch carries Ethernet frames, which are units of information sent over these links. It does not choose or repair our IP settings. GNS3's built-in switch supports VLAN port modes, which can separate local groups, but we do not change those settings today. This exercise uses only the built-in switch and VPCS, so it needs no Cisco software image.
- A topology shows which device connects to which other device.
- PC1 and PC2 are separate test computers, each with its own console.
- Leave the switch settings unchanged for this first exercise.
Read an address before typing a command
Internet Protocol, shortened to IP, provides rules for addressing and moving information across networks. An IP address identifies a network connection. We use IPv4, one version of IP. An IPv4 address has four numbers separated by dots. In 192.168.10.1, read the numbers as 192, 168, 10 and 1. Each number can range from 0 to 255. It is not a decimal fraction.
A subnet is a local IP group. A subnet mask tells the computer where that group's boundary lies. Our mask is 255.255.255.0, also written /24 for IPv4. With this mask, the first three numbers identify the group, while the last number distinguishes the addresses we use inside it. Thus 192.168.10.1 and 192.168.10.2 are local to each other. This shortcut is specific to this mask. Later lessons teach other boundaries.
A router connects different IP networks. A default gateway is usually a router that helps a computer reach other networks when no more specific path applies. Our two computers need no gateway because their addresses share one local group. We deliberately do not connect the lab to the Internet.
A console is a text window for one device. A command is an instruction you type there. The prompt, such as PC1>, identifies the device waiting for input. Type only the command, then press Enter. The ip command sets an address, show ip displays settings, ping asks another device for a test reply, and save keeps settings for later. The lab explains every argument beside its command.
- Read the device name before typing; the same command in the wrong console changes the wrong computer.
- The mask matters as well as the address; compare both with the plan.
- Type spaces and dots exactly as shown, then press Enter after each command.
Use a small test to find one mistake
Troubleshooting means finding why something does not work. Begin with a prediction. In this lab, PC1 should receive replies when it tests PC2. Run the test and compare the result with that prediction. A successful ping is a useful observation, not a guarantee that the Internet or every application works.
Ping uses Internet Control Message Protocol, or ICMP. It sends an echo request, a test message asking for a reply. A reply from the expected address shows that the request and response travelled successfully at that moment. Reply text often includes a time value. The exact wording and timing can vary, so do not demand a perfect copy of someone else's output.
We then change only PC2's address from 192.168.10.2 to 192.168.20.2. With our mask, this puts PC2 outside PC1's group. PC1 has no router or default gateway for that other group. Its test to the new address should fail. Keep the failure text. Read show ip on both devices before changing anything else.
Restore PC2's planned address and return to PC1 to repeat the original test. Testing PC2 from itself is not enough: a self-test need not cross the connection to PC1. If the repeated peer test succeeds, the change and the result support your explanation. If it still fails, inspect the console selection, addresses, running devices and links one at a time.
- Predict the result before running a test, then record what actually happened.
- A failed ping is a symptom; read the settings before deciding its cause.
- After a repair, repeat a test from the other device, not only a self-test.
Keep a short note you can use next time
Use a notebook or a notes app. Give the note the same name as the project, such as CCNA-Day-01. Write the date, the addresses you intended to use and which device ran each test. Then record the result in ordinary language. You can write 'PC1 received replies from PC2' before learning every field in the output.
Keep four short lines for each experiment: I expected; I saw; I changed; I checked again. These are learning notes, not a formal report. If you make a typing mistake, record how you noticed it. That makes the next attempt easier and helps a teacher understand your question. Avoid copying a long screen of output without saying which result matters.
Saving a GNS3 project and saving each VPCS device's settings are different tasks. In each VPCS console, save stores its current configuration in a startup file. A configuration is the set of settings a device uses. Keep the GNS3 project as well, because it contains the devices and their connections. When you reopen the project, start the devices and check their settings rather than assuming everything is correct.
Try the guided version first. On another attempt, cover the commands and explain the next action before revealing them. Use the practice questions before the scored quiz. A wrong answer shows which idea to revisit; it does not mean you cannot learn networking. Do not store real passwords or private customer information in practice notes.
- Record the device, the expected result and the actual result together.
- Save each VPCS configuration as well as keeping the GNS3 project.
- Repeat unclear steps; the release of the next lesson is not your deadline.
Practice safely and know what you do not need yet
An isolated lab has no link to your real home, school or office network. Keep this first project isolated. Do not add a Cloud or NAT node, which can connect a lab to other networks. Do not type the commands into a work router, your phone's settings or the browser address bar. The instructions name the intended VPCS console.
Installation needs a suitable computer and permission from its owner. Start with the official guide for your operating system. Windows and macOS are operating systems: the main software managing a computer. Ask for help if the installer, local server or console does not start. Do not turn off security software or change a shared network to make an exercise work.
This first lesson needs no Cisco software image. An image, in this context, is a file containing device software. Later Cisco labs may need one. GNS3 does not supply those images. A license defines how software may be used, so obtain it through an authorized source and check the terms for the intended platform. Owning a device does not automatically permit every simulated use.
Cisco Modeling Labs, often called CML, is another official way to run Cisco practice labs under its own terms. Do not assume a CML license permits exporting its images into GNS3. You can decide about later software when you reach a lesson that needs it. For now, two VPCS devices, one built-in switch and careful observation are enough. Paper exercises help understanding but do not replace the later hands-on checks.
- Run these commands only in the named practice-device console.
- Use the official installation guide and ask for help instead of disabling security controls.
- No Cisco software purchase or image download is needed for this first lab.
Real-world walkthrough
Two office computers cannot reach each other
Imagine helping at a small office. Two computers are connected to the same local switch. Someone changed one computer's address, and a simple test now fails. We copy this situation into an isolated practice lab. We do not experiment on the office's real computers.
- Write down the planned addresses for PC1 and PC2 before changing any setting. With the lab mask, both should begin 192.168.10.
- Open each device's own console and use show ip to read its actual settings. Notice whether the values match the written plan.
- PC2 shows 192.168.20.2 instead of 192.168.10.2. Explain the group mismatch before correcting only PC2's address.
- Switch back to PC1 and test PC2 at 192.168.10.2. Keep the replies and compare them with the earlier failed test.
- Save the corrected settings on both practice devices and write a short explanation of the cause, the change and the successful repeat test.
Guided GNS3 lab
Connect two practice computers and fix one wrong address
Build a small network in GNS3, give each practice computer an address, and check whether they can exchange test messages. Then change one address, observe the failure and restore the working settings.
Addressing plan
| Device | Interface | Address | Purpose |
|---|---|---|---|
| PC1 | Ethernet0 | 192.168.10.1/24 | PC1's address in the shared local group; /24 means mask 255.255.255.0. |
| PC2 | Ethernet0 | 192.168.10.2/24 | PC2's different address in the same local group; no default gateway is needed. |
Set up the lab
- Open GNS3 on the computer where it is installed. Confirm the local server is running. It is the program that runs your practice devices; it can run on this same computer. Use the official local-server guide if setup has not finished.
- Open the File menu and choose New blank project. Enter CCNA-Day-01 as the project name, choose a folder you can find again and confirm. The large workspace is where you will place the devices.
- Choose Switches in the device list. Drag the built-in Ethernet switch onto the workspace. Rename it SW1 using its right-click menu. Do not select a Cisco appliance that asks for a software image.
- Choose End devices. Drag VPCS onto the workspace twice to create two separate practice computers. Use the local server if asked. Rename the first PC1 and the second PC2 in their right-click menus. Keep track of which is which.
- Choose Add a Link. Click PC1 and choose Ethernet0, then click SW1 and choose Ethernet0. Repeat from PC2 Ethernet0 to SW1 Ethernet1. Choose Add a Link again to leave link-adding mode. Do not add a Cloud or NAT connection.
- Leave the switch's port settings at their shared default access segment. An interface is a connection point; Ethernet0 and Ethernet1 are its names. The links should match PC1 -- SW1 -- PC2, with a different switch port for each computer.
- Use the green Start/Play control to start the devices. Right-click PC1 and choose Console; do the same for PC2. Check the device name in each text window. If the names differ from the lesson, identify each by its workspace label before typing.
- Read the address plan below the topology. In every command block, type one line at a time in the named VPCS console and press Enter. Do not type a prompt such as PC1>. Do not use your browser or your real computer's command window.
Set PC1's address
Click the PC1 console so it receives your typing. Type the first line exactly, then press Enter. Wait for the prompt to return. Type show ip and press Enter to read back the setting you entered.
ip 192.168.10.1 255.255.255.0
show ip
What each command means
ip 192.168.10.1 255.255.255.0- ip sets this VPCS device's address. 192.168.10.1 is the address being assigned; 255.255.255.0 is its subnet mask, also written /24. Separate the command and both values with spaces. Keep dots inside each value. Press Enter in the named console.
show ip- show means display, and ip selects the Internet Protocol settings. This command reads the address and mask without changing them. Type both words with a space, then press Enter in the named VPCS console.
- What you should see
- PC1 should show address 192.168.10.1 and mask 255.255.255.0 or /24. No gateway is needed; its field may show 0.0.0.0.
- Why this step matters
- Setting an address gives PC1 a usable network label. Reading it back catches a typing mistake before we build on it.
Set PC2's address
Switch to the PC2 console. Check the name before typing. Enter the address command, press Enter, then enter show ip and press Enter again. Compare PC2's last address number with PC1's.
ip 192.168.10.2 255.255.255.0
show ip
What each command means
ip 192.168.10.2 255.255.255.0- ip sets this VPCS device's address. 192.168.10.2 is the address being assigned; 255.255.255.0 is its subnet mask, also written /24. Separate the command and both values with spaces. Keep dots inside each value. Press Enter in the named console.
show ip- show means display, and ip selects the Internet Protocol settings. This command reads the address and mask without changing them. Type both words with a space, then press Enter in the named VPCS console.
- What you should see
- PC2 should show 192.168.10.2 with mask 255.255.255.0 or /24. It must not have exactly the same address as PC1.
- Why this step matters
- The two computers use different addresses inside the same group. Copying PC1's complete address onto PC2 would create a conflict.
Send the first test from PC1
Return to the PC1 console. Type ping 192.168.10.2 and press Enter. Wait for the test to finish. Look for replies from PC2's address, not only the presence of text on screen.
ping 192.168.10.2What each command means
ping 192.168.10.2- ping asks the device at 192.168.10.2 for test replies. The number after the space is the destination, not a new address for this PC. Press Enter in PC1's console and inspect the replies or error.
- What you should see
- Look for replies from 192.168.10.2. Timings and the first attempt may vary. If there are no successful replies, use the troubleshooting checks before proceeding.
- Why this step matters
- A reply tests a journey from PC1 to PC2 and back. It does not show that the Internet or a separate application is available.
Give PC2 one deliberately wrong address
Switch to PC2. Read the third number carefully: this step uses 20 instead of 10 on purpose. Type the address command, press Enter, then run show ip. Do not change PC1, the mask or any links.
ip 192.168.20.2 255.255.255.0
show ip
What each command means
ip 192.168.20.2 255.255.255.0- ip sets this VPCS device's address. 192.168.20.2 is the address being assigned; 255.255.255.0 is its subnet mask, also written /24. Separate the command and both values with spaces. Keep dots inside each value. Press Enter in the named console.
show ip- show means display, and ip selects the Internet Protocol settings. This command reads the address and mask without changing them. Type both words with a space, then press Enter in the named VPCS console.
- What you should see
- PC2 now shows 192.168.20.2/24. With this mask, it is in a different IP group from PC1. Keep a note of the change.
- Why this step matters
- Changing only one setting creates a controlled mistake. We can compare the result with the test that worked before the change.
Observe the failed test from PC1
Return to PC1, not PC2. Type ping 192.168.20.2 and press Enter. This is PC2's newly changed address. Read and record the failure message without changing anything else.
ping 192.168.20.2What each command means
ping 192.168.20.2- ping asks the device at 192.168.20.2 for test replies. The number after the space is the destination, not a new address for this PC. Press Enter in PC1's console and inspect the replies or error.
- What you should see
- The peer test should not receive successful replies. VPCS may report a missing gateway or unreachable destination rather than identical timeout wording.
- Why this step matters
- PC1 has no route or gateway to the other IP group. A shared switch link alone does not give it a route between different IP networks.
Restore PC2's planned address
Switch to PC2 and enter the original address command with 10 as the third number. Press Enter, then run show ip and press Enter. This checks PC2's own setting; the next step checks the path from PC1.
ip 192.168.10.2 255.255.255.0
show ip
What each command means
ip 192.168.10.2 255.255.255.0- ip sets this VPCS device's address. 192.168.10.2 is the address being assigned; 255.255.255.0 is its subnet mask, also written /24. Separate the command and both values with spaces. Keep dots inside each value. Press Enter in the named console.
show ip- show means display, and ip selects the Internet Protocol settings. This command reads the address and mask without changing them. Type both words with a space, then press Enter in the named VPCS console.
- What you should see
- PC2 should again display 192.168.10.2/24. Compare all four address numbers and the mask with the plan.
- Why this step matters
- Correcting the observed mismatch restores the intended group. Reading the setting alone does not prove that the peer connection works.
Check the repair from PC1
Click the PC1 console. Enter ping 192.168.10.2 and press Enter. Compare the replies with the failed test. Do not run this command only on PC2: that would be a test to its own address.
ping 192.168.10.2What each command means
ping 192.168.10.2- ping asks the device at 192.168.10.2 for test replies. The number after the space is the destination, not a new address for this PC. Press Enter in PC1's console and inspect the replies or error.
- What you should see
- PC1 should receive replies from PC2 again. Record the responding address. If the test still fails, follow the checks below instead of declaring the repair complete.
- Why this step matters
- Repeating the test from the other computer checks the intended connecting path. A self-ping could hide a broken path between the two devices.
Save each computer's settings
In PC1's console, type save and press Enter. Then switch to PC2 and do the same. Read the response in both windows. Keep the GNS3 project and your notes before stopping the devices.
saveWhat each command means
save- save stores this VPCS device's current settings in its startup file. Press Enter after the word. Repeat separately in the other VPCS console; it does not save both devices with one command.
- What you should see
- Each VPCS should report that its configuration was saved, normally to startup.vpc. Both devices need their own save command.
- Why this step matters
- Saving keeps the working settings for another practice session. Saving PC1 alone does not save the separate settings held by PC2.
Verify
- On PC1, run show ip and press Enter. Confirm 192.168.10.1 with mask 255.255.255.0. On PC2, repeat and confirm 192.168.10.2 with the same mask.
- From PC1, run ping 192.168.10.2. From PC2, run ping 192.168.10.1. In the second command, 192.168.10.1 is PC1's address. Look for successful replies in both directions.
- Compare your notes from the deliberate wrong-address test with the repaired test. Explain which one setting changed and why that affected this isolated lab.
- Check that both save commands succeeded. When you return to the project, start the devices, inspect their addresses and repeat the peer tests before building anything new.
Troubleshoot
- No prompt or typing does nothing? Confirm the VPCS node is started, its console window is open, and that window is selected. Do not type into GNS3's application log pane or your browser.
- A command is rejected? Compare spaces, dots and numbers with the block. Type only the command, not PC1>. Confirm this is a VPCS console, because another device type uses different commands.
- No peer replies? Read show ip on both computers. Check the address and mask against the plan, then inspect both simulated links and the switch ports they use. Correct one mismatch and test again.
- A device will not start or the console will not open? Read the GNS3 error and consult its official installation or local-server guide. Ask the computer owner or instructor for help. Do not disable security tools as a shortcut.
This lab uses GNS3's built-in VPCS and Ethernet switch, so no Cisco image is required. GNS3 does not provide Cisco images for later appliance labs. Use software whose license permits your intended platform, or run the exercise inside Cisco Modeling Labs under its terms; a CML license does not automatically permit exporting its images to GNS3.
- Run save in both VPCS consoles after restoring the correct addresses. Keep the successful test results in your lesson note.
- Use GNS3's Stop control to stop the practice devices. Keep the working project for your next attempt; delete only a disposable copy you intentionally want to rebuild.
Practice set
Answer before you reveal
01Why do PC1 and PC2 use different last numbers in their addresses?
The group is the same with this lab's mask, but each connection needs its own address. Giving both computers the same complete address would create a conflict rather than make communication easier.
02With mask 255.255.255.0, why does changing PC2 to 192.168.20.2 break this lab's peer test?
PC1 is still in 192.168.10.0/24. A shared switch connection does not supply a route to 192.168.20.0/24. The mask is part of the reasoning; the first-three-numbers shortcut is not valid for every mask.
03Which command lets you read a VPCS address without changing it?
show means display. Check the device name first so you read the intended computer. The ip command followed by address values changes a setting; show ip only displays it.
04Why must you use save in both VPCS consoles?
Saving PC1 does not tell PC2 to save. Keep the GNS3 project as well, then check both devices' settings when you return rather than assuming that every save succeeded.
05PC2 can ping its own address after a repair. Does that prove the link from PC1 works?
A self-test can stay inside PC2. It need not use the link to the switch or the link to PC1. A reply to PC1's test provides evidence about the path between the two computers.
06You only have a phone today. What is a useful safe way to start?
The paper task helps you reason about addresses without changing a real device. It does not replace hands-on practice. Return to the isolated GNS3 exercise when a suitable computer and any needed help are available.
Knowledge check
Quiz: prove the reasoning
Keep these
Technical takeaways
- A network lets connected devices exchange information; it does not always need the Internet.
- Read the address and mask together. Our /24 example puts 192.168.10.1 and 192.168.10.2 in one local group.
- Select the intended console, type one command, press Enter and inspect the response before continuing.
- Predict a result, test it, change only the confirmed mistake and test again from the other computer.
- Save each practice computer's settings and keep short notes that explain the result.
- Use an isolated lab, repeat at your own pace and ask for help when a step is unclear.